This project was a good exercise and learning experience for me. I learned a couple things the hard way (sometimes the best way):
- It turns out water isn't as conductive as I thought it would be.
- 5vdc in tap water is enough to electro etch (erode/dissolve) small wires in about a day.
Watering live Christmas trees is a real pain. Depending on the size of the tree and stand you could be crawling underneath twice a day to refill. Or you can forget to water it and have a very dead tree early in the season. I've had this idea mulling about in my head for a couple of years now, but never really got the bug to try it out. But this year when we went and got our tree I saw something at the farm that really lit a fire under me. I saw a long funnel with a sensor that let you know when the tree was dry. I picked it up and told my kids, "Hey! This was my idea. But mine's better. It fills the tree up for you."
My son responded, "Well, why don't you build it?"
So I did...
The idea was simply to have a water tank beside the tree that could hold enough water to keep the tree fed for a few days, some simple sensors in the tree stand to sense when the water was low, and a pump to refill the tree.
After some Google searching I found a similar project for
Self-Watering Plants which I used as a starting point. I already had an Arduino on hand that wasn't currently being used, and with a "shield" attached to it I could make something semi-permenant that could be reused year after year but still make the Arduino available for other projects. Of course, I also considered building a dedicated circuit with a 555 chip (or similar) and avoid using a micro-controller, but I'm not skilled enough with circuit design to be that clever. Also, I wanted to be able to do some things that I had absolutely no idea how to do otherwise, and I needed to get something in place quickly. And, having an easily programmable controller made it very easy to make some much needed adjustments.
 |
| Controller circuit, Prototype #1 |
My first prototype used the digital pins on the Arduino for the water sensors, with the assumption that putting the leads in water would be just like closing a switch. This didn't work at all. In all my planning and testing I never actually tried the leads in water, and it turns out that water isn't quite conductive enough for this to work. Back to the drawing board...
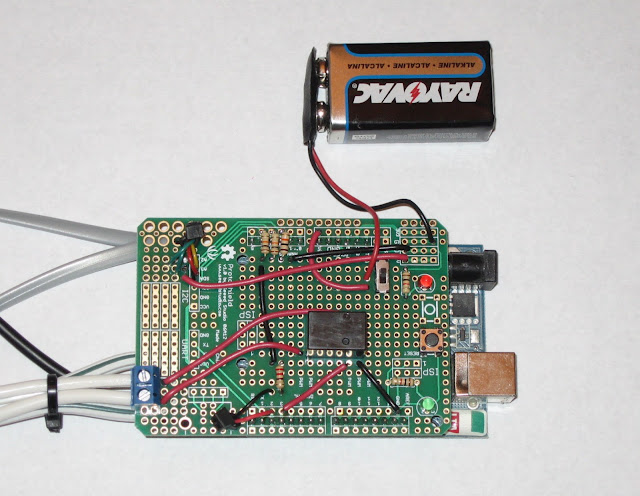 |
| Controller circuit, Prototype #2 |
Can I just go on a tangent and gush about this awesome little kit? (Of course I can, it's my blog.) For a little less than $10 (and can even be
found at RadioShack...that's where I got it) you get a very nice board that makes it super easy to build an ad-hoc shield for your Arduino AND it comes with a whole bunch of components. I highly recommend this product.
And while I'm at it, can I also complain about the odd header spacing on the Arduino? Why in the world is one of the headers shifted by half a space, making it impossible to interface properly with standard perf boards? This is the stupidest thing I've ever seen. Love you Arduino, but come on!
Anyways...
The second prototype used the analog pins (A2, A3, A4) to read the low (and variable) voltage value actually being conducted through the water. When the leads are dry the voltage is 0 (or very close to it), but when wet there is a high enough reading to make a comparison in the code.
I thought the 9V battery would be plenty for powering the Arduino. Unfortunately either the batteries I used were old and nearly dead already, or the board was using a lot more juice than I thought it would. I was replacing the battery every day. After 4 days of that I just powered it with a USB adapter and ditched the battery.
The relay I used also came from RadioShack (
5VDC/1A SPDT Micro Relay, Model: 275-240)
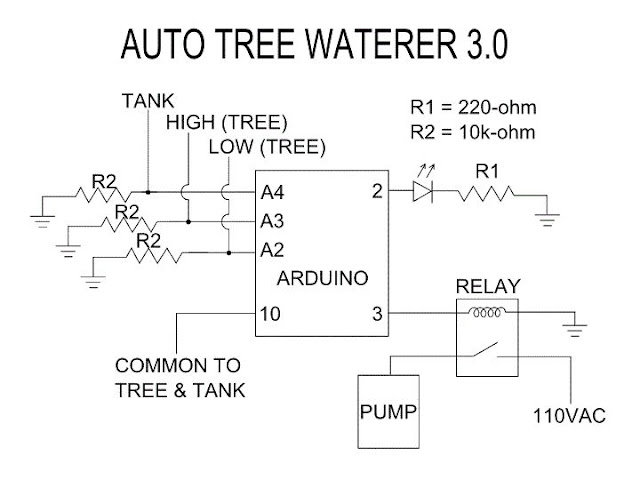 |
| Final Circuit Schematic - The LED is used as a status indicator and is mounted in the tree |
(See the very bottom of this post for the final
Arduino code.)
 |
I picked up a submersible water
pump at the local pet store. |
This submersible water pump is low power so it won't burn out the relay. It's also nice and quiet. It only comes on for less than a minute once or twice a day, but I don't want something that's loud and scary. This has a very soft, pleasant hum.
 |
| Tree water sensor, Prototype #1 |
 |
| Tank water sensor, Prototype #1 |
The first sensor prototypes were just very thin wires from a phone cable. I didn't think I would need much more than that. But after a couple of days the sensor malfunctioned and the tree peed all over the carpet (and got several presents very wet). It turns out that the 5v lead that was always on was getting etched away, or basically dissolved. Then when the tree started filling up it didn't know when to stop and just kept filling...2 gallons of water soaked into my living room carpet. My wife was not amused.
 |
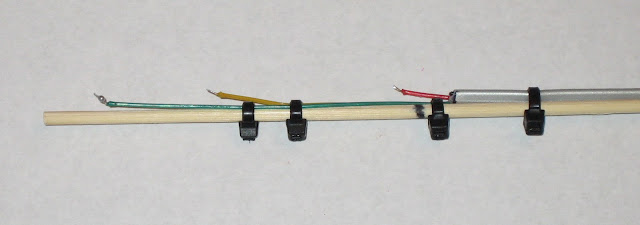
| Tank (top) and tree (bottom) water sensors, Prototype #2 |
So I beefed up the sensors by soldering them to some heavier wire. Then I also changed the controller circuit and code. Instead of running the sensors from the constant 5v power, I got the power from a digital pin (Pin 10, shown in the schematic above) that I could turn on and off. Then I could just turn it on long enough to get a reading and turn it back off again. I set the code to take readings every 5 minutes. I could actually set it for a much longer period than that, like every hour, but I also wanted to be able to monitor it and make sure the code is behaving the way I wanted it too. With these 2 changes I added a great deal of life to the sensors and haven't had any problems since.
 |
| Water tank and controller - they can be disguised as a present by putting a wrapped box over the top |
 |
Fill tube and sensor wires - the fill tube must not be submerged in the
water or it siphons the water back out into the tank. |
After making all of the above fixes it's been running great. I only have to refill the tank every few days, and the tree never runs dry.
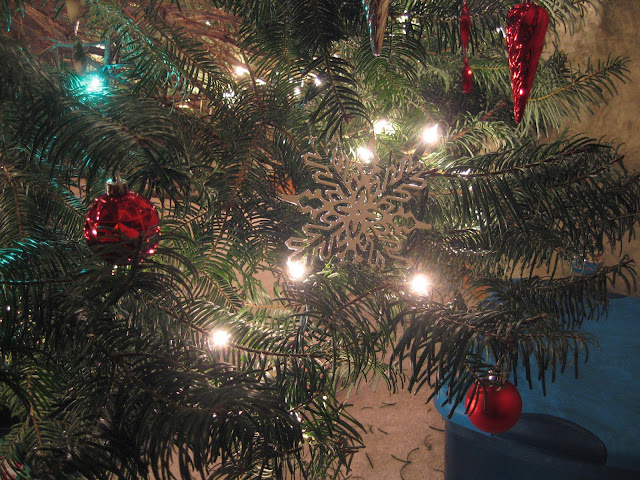 |
| Green indicator light, upper left corner |
When the indicator light starts blinking I just refill the tank.
Even though I'm happy with this final prototype, I've still got plans for more improvements. I'm thinking of trying a capacitive sensor for improved resistance to etching and allow for better adjustment of water depth. Several people have suggested I build a kit or product for sale, which I think would be an interesting challenge. Something like that would require a lot more design and testing. This is close, but not yet marketable.
Arduino code:
(If you don't see the above code,
click me.)


