Wednesday, December 22, 2010

Confetti Canon

Following in the tradition of my chainmail dice bag, I thought I had an original idea only to find someone post a similar project just a few days after I completed mine.

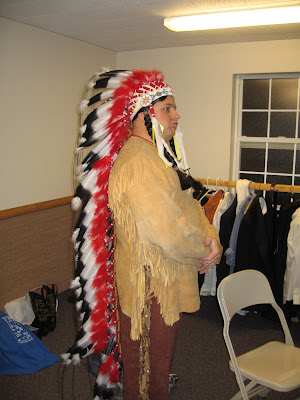
During a rehearsal for Annie Get Your Gun (if you didn't see this post I played the part of Chief Sitting Bull), I was watching the director describe the effects she had in mind for Annie's big trick.

It involves 6 girls each holding 2 balloons and standing in a circle around Annie. Annie then shoots out 1 balloon per girl in time to music.

(Shoot the yellow ones first.) 

Then she steps to down/right stage while the girls kneel in a line and she shoots out the remaining 6 balloons in one shot, then shoots at a target that falls and breaks more balloons. All balloons being filled with confetti to enhance the explosions and make a mess.

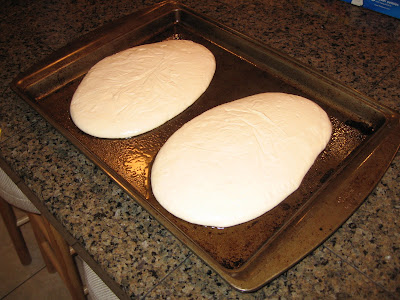
Side note - The sticks the balloons were mounted on originally had a dowel with some carpet staples on the end that the girls would push up into the balloon to pop it. It wasn't working right so I also came up with the idea of electrifying it. Using a 9V battery, a small switch, and a small strand of steel wool taped to the balloon. It worked great on the balloons I tested. But during rehearsals things weren't working right at all (as can be seen in the above photo). The balloons were too thick and a hole would get burned into them without popping. With no more time to work out the bugs and/or get new balloons the girls just held them in their hands and poked them with tacks...and that method worked perfectly! 

Back to the air canon... 

I got the idea of using a compressed air canon instead of balloons in the final shot to really launch the confetti and make an even bigger explosion (and mess). I mentioned the idea to the director who thought it would be really cool as long as it was safe and cheap.

I said yes to the safety and a maybe to the cheap. I had seen the build plans in Make Magazine for a compressed air rocket launcher that looked like it would be simple enough, cheap enough, and safe enough, and with a minor modification good enough to make a big confetti mess.  
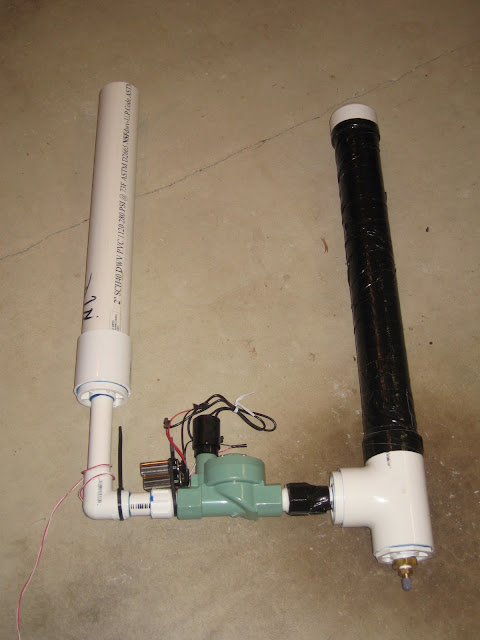
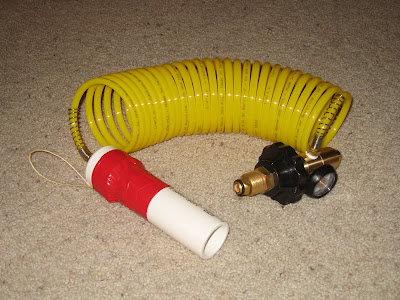
The black pipe on the right is the air reservoir (wrapped in duct tape for safety). I made it slight larger than the instructions say because I wanted a little extra volume to make sure I have plenty of air for all the confetti. At the bottom is the sprinkler valve powered by 2 9-volt batteries. The pipe on the left is the confetti tube. The air reservoir gets pumped up to 60-70 psi with a bicycle pump.

Two days after I complete my canon I see a very similar project on Hack A Day. Which is actually a repost of the same project from Make Magazine back in Feb 2008

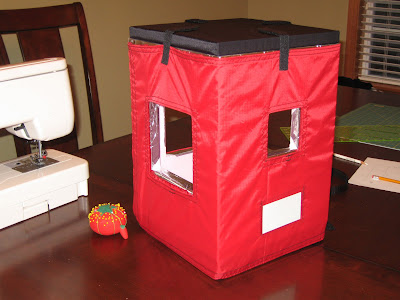
If anything I'm glad to see this come up. It's a good reassurance that I was on to something. I tested out my canon with some tissue paper and various types of wadding. I found that just a single paper towel wadded in a loose ball and stuffed to the bottom of the canon worked best. Things were looking good. I took it to the director and she was very impressed. We just had to figure out something to put it in.

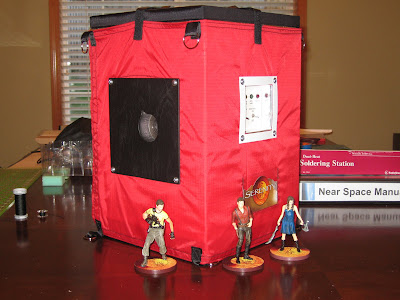
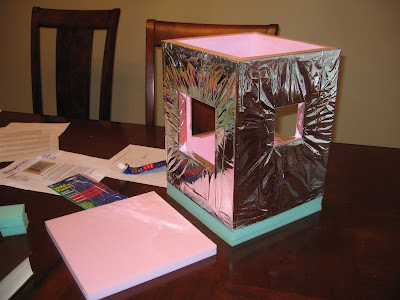
Originally she was thinking of a crate, but the one she had was too small for this canon. Then she found a free plastic water barrel that was perfect. I cut out the top and bottom and mounted it inside with a couple pieces of 1x2. A paint job to make it look like a real barrel and a big target for Annie to shoot at and it was done.

I also made a trigger with a glowing safety switch (to prevent accidental firing back stage).

Unfortunately I didn't get any photos of the final painted barrel or firing switch.

(Here I am back stage ready to fire on cue.)

Before each performance I'd charge up the air and fill up the confetti. During the trick I would be backstage anyway so I got to be the one to fire it. And it worked perfectly each time. The explosion would be big enough to launch confetti up to the ceiling (sometimes pieces would even stick and float down later). And of course it would make a huge mess all over the stage.

I was hoping to get some video or at least photos of it in action. A video exists somewhere, I just haven't got it. If it gets to me later I'll see if I can post just the clip of the canon explosion.

Warbonnet

So I was just in the play Annie Get Your Gun, playing the part of Chief Sitting Bull. I'm not really an actor, but it was a fun experience and I made several new friends.

One important piece to Sitting Bull's costume was the warbonnet, which was going to be too expensive for the limited performance budget. So I decided I'd buy it and make it myself, getting to keep it after the performances are over of course.

I bought the double trailer warbonnet kit from Crazy Crow Trading Post. It shipped and arrived fairly quickly, about 10 days (if I remember correctly). The kit contains all "real" materials. The feathers themselves are turkey feathers dyed to look like eagle feathers. I was missing 1 of 2 rosettes, but I called Crazy Crow and they shipped me another pair right away.


The instructions seemed clear at first, but during actual assembly I hit a few stumbling points that were just not clear enough. More pictures and more detail would have been helpful.

For instance, the final step involves lacing the feathers together with a piece of waxed string. This holds the feathers back and keeps them spaced evenly and hanging correctly. The instructions say to make holes in the back of the quill about 4 inches from the bottom and lace the thread through those holes. That's pretty much all the info you get. But there really isn't much space on the quill at that location to make any kind of hole big enough to lace this thick waxed thread. Also, how are you supposed to even make a hole? The instructions suggest using a needle or awl. Ha! No way that's going to work. The quill is very hard and trying to pierce it seems impossible without injury. And even if you manage to pierce it I would imagine it would split instead of making a puncture.

By the time I got to that stage of assembly I had 2 days left before the first performance. I actually did the final lacing in my dressing room during a dress rehearsal. What I ended up doing was just fish the thread between the 2 glue points for the red fluff feathers. It wasn't an ideal solution, but it worked well enough to hold up for 2 dress rehearsals and 3 performances.


Several feathers are in desperate need of repair. And I want to redo the lacing, and find a better way to do it. Other than that it is still in fair condition. It came with 90 feathers. About 10 of them are just too ugly to use, and I only attached 64. So I still have plenty left over if I need to replace some. (One or two have tips that are breaking off.)

Presenting "Teeth of Many Bears" to Annie:


For anyone else wanting to try making such a warbonnet, the pictures in the catalog or online help to make up for what is lacking in the instructions. Other than that some creativity is needed. Also, allow yourself lots of time. It took me about 80 hours total. There are several "glue and wait" points during assembly, so allow for that as well.

If I want to continue to build out my Native American costume pieces I would definitely use Crazy Crow again.

Other parts of the custume above:
  • A horribly tight and uncomfortable wig
  • A leather shirt (borrowed) - which was actually much more comfortable and not as hot as it would seem. The sides and arms were slit and tied to make the fringe, which added greatly to the ventilation. I actually really liked that shirt.
  • (A t-shirt under the leather shirt)
  • A necklace of real bear teeth and claws ("Teeth of Many Bears")
  • Beaded pants - fabricated by our costume seamstress. They would have been comfortable as pajamas if not for the beads
  • "Moccasin" slippers - fur lined and really hot. Those things made me sweat more than any other part of the costume. When I wasn't on stage I was barefoot and carrying the slippers.
In the ballroom scene:
  • A suit jacket worn on top of the regular costume.
  • A top hat with feathers worn in place of the warbonnet.
My ballroom costume got huge laughs. I just had to step out on stage and the audience started busting up. Fortunately I practiced keeping a straight face or I might have busted up as well.

Monday, August 30, 2010

Breaking Atmo

4:30am Tired
5:30am Excited
6:30am Nervous
7:30am Anxious
8:30am Frenzy
8:45am Worry
9:00am Relief
9:30am Giddy
10:30am Heartache
11:30am Frustration
12:30pm Hunger
1:30pm Acceptance
2:30pm Curiosity
4:30pm Hope
6:30pm Hunger
8:30pm Surrender
10:30pm Exhaustion

That was my day, August 28, 2010 - Launch day.

The morning went great. We had an early start. It was a beautiful day. I had submitted the NOTAM to begin at 8:30am. I wasn't sure exactly how long it would take to get everything ready for launch, so we arrived at 6:00 to give us plenty of time. It turns out that we had everything finished and ready to go by 7:30, so we really could have started an hour later.

From Balloon Launch


This intermission was actually kind of nice. It gave us time to relax a little and let the nerves settle. We also had friends and passersby come around and we could show off the whole setup. My friend Mark showed up and provided assistance, as well as my neighbor Terry (who is also a HAM and provided technical assistance in the weeks prior to launch, took photos and video that are featured in this post, and was also tracking at home).

From Balloon Launch


During systems testing we were getting good data over APRS. Everything seemed to be running just fine.

From Balloon Launch


The launch occurred at 8:30am.

From Balloon Launch


We packed things up as fast as possible and returned home to return the helium tank to the garage before heading out on the chase. But just a few minutes after launch, when the balloon was at about 3000 feet, we lost contact. We still had good visual contact, but nothing over APRS. Visual contact is fine for chasing a balloon, but ultimately we needed to chase a parachute that is smaller, moving faster, and impossible to chase visually.

I figured (hoped) we might pick up the signal again when we headed into the city towards the landing zone and towards more digipeaters.

Pre-flight prediction:


It looks even better in a 3D profile in Google Earth.
Download the KML file here: Prelaunch_prediction_20100828_1500.kml

Unfortunately we got nothing. I wasn't sure if the problem was on the payload, which I could do nothing about, or if the problem was with our mobile rig. But along the way I got a phone call from my mother-in-law and she told me she was tracking it on the APRS website and it was passing over Lake Oswego (see 9:00am Relief above). This made me feel much better to know that the payload was doing fine and it was being tracked by the digipeaters.

When we were about half-way to the landing zone we found a little donut shop with WiFi. Once we were online we too were able to finally track it and it was doing great. Moving along very closely to how the prediction model went. We were still tracking it visually too. In fact, we sat in the donut shop parking lot watching and tracking. The kids standing outside the car looking up at it with me inside calling out altitudes. Things got really exciting when we passed 90,000 feet. I hadn't really expected it to go that high. I intentionally overfilled the balloon to get 9 lbs lift to make it rise faster (we got about 1200 ft/min ascent rate), and this reduces the maximum altitude. But it just kept going.

It finally burst just moments after reaching 100,659 feet. An event that the ground crew was able to visually witness. And the descent began.

From Balloon Launch


Descent looked good. It was very fast at first (about 6000 ft/min = 68mph), which I expected (the thin atmosphere isn't enough to slow the parachute). It was showing signs of slowing as it dropped below 48,000 ft (3000 ft/min). So the parachute appeared to be working. Then after we got an update from 46,047 ft there were no more updates. Just silence. My heart sank. That's when I got a call from Terry and we figure the cold temperatures got into the electronics and froze things up.

From Balloon Launch


From Balloon Launch


Download Excel worksheet: flight data.xls

We were hoping that once the batteries warmed up things would turn back on, but then David pointed out that the GPS receiver will not automatically restart. And sure enough, we never did get another packet. We left the donut shop and continued towards the landing zone, scanning the sky the whole way hoping to see the parachute descending. I estimated a new landing zone based on the actual tracking data and we began a sweep of the area, driving slowly with the windows down listening for the audio beacon and scanning the grounds and trees.

After 2 hours of searching the kids were getting on each others' nerves as well as mine and we headed to lunch, then home.

At home I sat down and began to pour over the APRS data. I refined the prediction using the actual ascent rate and burst altitude and came up with a couple models. Comparing them to the actual graph I estimated that it must have landed somewhere between the 2 new models, which put the landing further north-east from where we had been searching earlier.

Modified prediction at 1500 UTC:


Download the KML file here: Modified_prediction_20100828_1500.kml

Modified prediction at 1800 UTC:


Download the KML file here: Modified_prediction_20100828_1800.kml

Actual flight path:


Download the KML file here:
Balloon_Path_20100828.kml

It must be somewhere between Gresham and Damascus. Using Google Earth I identified a few locations that looked suspicious (open fields or forested areas). We figure if it landed in a residential or business area someone will call the number attached to the payload. David and I headed out and left the others at home. We had about 3-4 hours of daylight left to continue the search. Fortunately the balloon hadn't drifted far so we were able to get back out to Damascus pretty quickly.

As we continued to search I came to the realization that the potential landing area was just too big for our sweeping/driving search. I don't know if the audio beacon was still sounding. There seems to be about a 50% chance that it's caught in a tree somewhere. And if caught in a tree there's about a 50% chance that it's in a residential neighborhood. So either way, there's a better chance that someone else will find it and call then there is for us to find it by driving around. But 2 days later I still haven't received a call. So my expectations are low at this point.

But we had a really fun time and it was a good experience. I learned a lot of great things that I will put into use on the next payload design and launch/recovery process.

Other interesting files:
Raw Packets 20100828.txt - contains raw packets from APRS website
20100828 log file.txt - formatted packets for use in UI-View32
MISSING - Serenity.pdf - funny poster

Lessons learned:

1. Batten down the hatch. The lid was sitting on top, strapped down by 4 velcro strips. I believe it was secured enough not to come off, but it wasn't secured against the wind blowing up under it and getting inside the payload. And wind was one thing I really didn't figure would be an issue. I knew it would fall fast, but the wind factor really didn't occur to me. I think that was the ultimate cause of the failure. So next time, wind resistant hatch.

2. More redundancy in the electronics and a system that can come back online automatically. Possibly a GPS receiver with an external antenna so the electronics can be bundled up nice and warm.

3. Learn how to locate radio signals.

4. I'd actually like to have a temperature sensor so that I can know the outside conditions. Possibly send that data as part of the APRS packet.

5. Get things hotter inside the payload before launch so that it takes longer for the cold to penetrate. Fill the thing with those microwavable, rice-filled hot pads for a couple hours before launch. Of course, remove them before launch and replace with packing peanuts.

6. Better mobile tracking rig. I suspect the problem was with my radio. It was just a cheap one. Need to upgrade.

Archive:
Part 1: Take Me Out Into The Black
Part 2: GPS Tracking Beacon
Part 3: More High Altitude Preparations

Monday, August 9, 2010

Sourdough Failure

A couple month ago, my sister blogged about her sourdough bread. I love homemade bread and like to make it whenever I have time (and ingredients). And since sourdough is a favorite at my house I thought I'd give this a try. I ordered up the sourdough starter from King Arthur Flour, fed it, and gave the rustic recipe a try.


A delicious loaf...of regular white bread. No sourdough taste at all. Is it just due to young starter? Is the starter dead? Is it the recipe?

Before I began assembling the recipe I gave the starter a sniff and it just smelled like bread dough. Having never worked with sourdough before I didn't know what to really expect. Then after refreshing the starter and letting it sit I noticed that it had taken on a very tangy smell. I figured the previous batch just didn't have the right flavor yet, and this new batch would surely be better. So I gave the "extra tangy" recipe a shot.

The extra tangy recipe requires a lot of mix and wait stages. Mix the starter with more flour and water (basically making a very large batch of starter) and let sit for 4 hours, refrigerate for 12, add remaining ingredients, knead, let sit another 5 hours, divide and shape, let sit another 2 hours, bake. Ugh. I have a problem with recipes that take this long. Oh, there's very little actual labor involved, but real life often gets in the way of meeting the bread's schedule. When bread takes this much planning and scheduling I don't like making it. But I had to give this a shot because I really needed to know if this recipe would be worth it.

The results: FAIL


That's the dough, "shaped" and ready for baking. No rise at all. The recipe contains no yeast, so all the rise comes from the fermentation of the starter.

The baked disaster:


It looks like the sourdough was fermenting. I see bubbles. Was it just weak and unable to get lift? Was the dough too heavy? The dough felt good after kneading it. But then, as it sat it became a sticky, gooey, blob. Sitting on the tray after dividing and forming it just became a puddle of dough. No life at all.

On the other hand, those bubbles might just be from the steam during baking and not fermentation. What we might have here is dead sourdough.

I wasn't able to follow the recipe's times exactly. In every stage the dough had to wait an additional hour or two to work around my schedule. I also ran out of AP flour and substituted a cup of bread flour (I anticipated this and mixed all the flour together at the beginning to prevent weirdness due to a switch in flour half-way through). Could one cup of bread flour have made a difference? I only used unbleached King Arthur Flour (as recommended) for all feedings and recipe building. So at least that's one variable we can remove from the equation.

The directions say to use "non-reactive" vessels when working with the starter. I am using the sourdough crock KAF sells. But for the first stage of the extra tangy bread I used a stainless steel bowl. Is stainless steel non-reactive to sourdough?

After baking it had a slightly tangy taste. Not exactly the sourdough taste I know and love from off-the-shelf bread though. And it was very dense and heavy...most likely due to the failure to rise. Where did things go wrong?

The starter still seems alive though. I can see it bubbling in the crock. I'm going to try to make it a little more sour with a whole wheat flour feeding. I'll definitely be giving the rustic recipe another try with a more sour starter. It's a very easy recipe with none of that overly long mix it up and wait stages. I can just feed the starter the night before, make the dough the next morning and by lunchtime I have bread.

I'm not sure yet if I'll try the extra sour method again. Maybe once I'm confident that the starter is still alive and doing well (and I have room in my schedule to babysit the dough).

UPDATE (8/11/2010):
The whole wheat feeding went well (I used whole wheat we milled ourselves). But only 1/2 cup water with 1 cup whole wheat flour made it too thick. I added another 1/4 cup water and let it sit out for 24 hours. The starter became very bubbly and lost it's doughy, sticky texture. (Up until this point the starter was very gummy, almost like a soft taffy.) Also, the tangy smell went away, which had me a little worried at first.

I made the rustic recipe again and it turned out great. Still not much of a sour taste to it, but this time it's a little more noticeable. Only slightly though. Also, after refreshing the starter (this time with unbleached KAF bread flour) and letting it sit out for 4 hours it became so active it grew to fill the crock over 3/4 full where before it would only sit at about 1/2 full.

I think I'll stick to making the rustic recipe for now. It's so simple and tasty. And the taste seems to be improving with time. It's probably just a matter of continuing to use the starter and letting it age.

More High Altitude Preparations

I'm still getting things prepped and ready to go. I have a launch date set for August 21st. Just about everything is ready. I finished the parachute last month. It's a 4 foot diameter spherical design. This size was determined by using the formulas and design found in the previously mentioned Near Space ebook. I estimated a payload weight of 7 pounds (6 pound capsule + 1 pound parachute). The actual capsule weight is going to be about 4 pounds, and the actual parachute weight came in at about 13 ounces, so the parachute is a little oversized. That will slow it's descent rate, but I want to also use it with future capsules that could get up to 6 pounds.


The 14 inch wooden hoop is attached to the shroud lines between the parachute and the payload. It prevents the lines from getting tangled and twisted during flight.

I also made the balloon filling nozzle last weekend. A very easy project since the hose I purchased already had the fittings attached. It did take a little longer than I had anticipated for the helium regulator to arrive though.


Things I still need to do:
Find a helium supplier
Get a car power inverter
Make a car "tray table" for the laptop

Those are the final major steps. There is still some minor (but important) support equipment that I need to gather up and make sure it's ready to go for launch day. Things like borrow a tripod, put together a tool kit, clean the plastic tarps, etc.

I'm actually a little nervous about launch. It's been a lot of fun planning and building everything. Now that it's coming down to last minute details, and knowing exactly how many little things that can go wrong and screw the whole thing up makes me both excited and scared. But as long as all the prep work is finished there's no reason to delay. It needs to do what it was built for. Serenity is just begging to be set free.

Archive:
Part 1: Take Me Out Into The Black
Part 2: GPS Tracking Beacon
Part 4: Launch - Breaking Atmo

Sunday, April 11, 2010

GPS Tracking Beacon

In my previous post I showed the status of the air frame for our high altitude balloon (Serenity). I have now completed the air frame. I added the attachment points in the corners and porthole covers (including 1 camera porthole, 1 control panel, and 1 antenna boom).


I also finished the on-board GPS tracker. I've seen other groups use cell phones for this. While that certainly is the simplest and lightest solution (and possibly the cheapest if you can find good deals), I think it's inadequate. Mainly because cell phones stop working at high altitudes. Well, technically, they work but the cell towers can't figure out how to hand-off so the phone gets no signal. So you don't get real-time tracking. You have to wait until it comes back down and hope it descends in a coverage area. I've seen where some teams completely lose track of and never retrieve the payload. I'm not willing to take that chance.

Instead, I went with a standard HAM radio solution. This type of tracker has been in use for many years and seems to be the most reliable. Again, I'm following the advise and designs from L. Paul Verhage's Near Space ebook, along with additional personal research.


From the photo:

1) Garmin eTrex GPS receiver (ebay $43)
2) Byonics TinyTrak3 TNC (Byonics.com $33)
3) Alinco DJ-S11 handheld 2M radio (ebay $35)
4) Audio beacon
5) Control panel
6) Serenity crew

The GPS receiver (1) was chosen for its ability to continue to work at high altitudes. Also, it's plentiful and easy to find on ebay. I actually bought 2. One for the balloon, the other for the chase vehicle.

The TinyTrak3 TNC (2) acts like a modem to translate and modulate the GPS serial signal into audio tones to be sent over the radio.

The handheld radio (3) will be tuned into 144.390 MHz, the standard North America APRS frequency. A HAM radio license is required to operate this radio and transmit on the APRS frequency. I just happened to get my license a few years ago. How convenient. (I also bought 2 of these. The second going in the chase vehicle. I'll cover the chase vehicle electronics and tracking equipment in another post.)

I did have to replace the retractable antenna on this radio. I can't have the antenna inside the airframe. The thermal blanket layers will block the radio signals to the ground. Also, most people agree that the antenna on this radio is poorly designed and inadequate. So I'll be mounting a 40 inch dipole antenna to the external boom.

The audio beacon (4) emits an ear piercing 2-tone beeping that's sure to be heard as we get closer to it. It's mainly a backup should the GPS beacon fail, or if we're close-by but just can't seem to find it.

The control panel (5) has power switches for the TinyTrak3 TNC and audio beacon as well as status lights for the TNC.

Yes, the crew (6) will be flying. Serenity just wouldn't be complete without her captain and crew. I wish the rest of the crew was available too, but only Mal, River, and Jayne are available in these small PVC figures.

Archive:
Part 1: Take Me Out Into The Black
Part 3: More High Altitude Preparations
Part 4: Launch - Breaking Atmo

Monday, March 1, 2010

Take Me Out Into The Black

I'm building a high altitude balloon for unmanned near space exploration. (Not to get political but...) The US government is dropping the ball on the whole space thing so I figured I'd start my own space program. (Hey, dude...Mr President. I voted for you. You owe me.) Unfortunately I don't have enough money to attempt Mars, the Moon, or even orbit. But I can't sit by and let science lose to American Idol. So...

Meet Serenity.


It's no secret that I'm a Browncoat. So when it came time to name our high altitude ship the answer was obvious. I figured since NASA wasn't going to use it for the Node 3 addition to the ISS then I'll take it.

I've been following the instructions written by L. Paul Verhage in his Near Space book (available for free download). I figured I'd defer to his experience and not reinvent the wheel. By following his book I hope to save some money by avoiding costly R&D and have a successful first attempt. After I gain some experience of my own then I can start to modify or redesign things.

Construction isn't complete. In the picture above Serenity is sporting a red and black nylon ripstop abrasion jacket. Each side features a port hole for future additions of experiment fixtures or instrumentation. A clear vinyl pouch (currently holding a blank card) will feature her name and flight record. I still need to add on the loops in the upper corners for attaching the parachute and balloon.

Here she is...ummm, undressed.


Constructed of 3/4" styrofoam with an outer sleeve of multi-layer insulation (3 layers of emergency blanket with 2 layers of tulle sandwiched between). The MLI is only on the sides and bottom, not the lid. Putting the metalized insulation on the lid will block the GPS signals. And a foam rubber "air bag" on the bottom for a softer landing.

The styrofoam and MLI will work together to reduce heat loss in the freezing temperatures of near space. The electronics (particularly the batteries) need to stay warm to function properly. Those big holes will, of course, also be covered. The abrasion jacket is designed to protect the package after landing. It will probably get dragged around on the ground and I'd like for things not to fall apart. It also serves as a nice bag to attach the balloon and recovery chute.

In addition to putting the final touches on the abrasion jacket, the next step is assembling the electronics. More specifically - learning how to use APRS and getting it set up and working.

Archive:
Part 2: GPS Tracking Beacon
Part 3: More High Altitude Preparations
Part 4: Launch - Breaking Atmo