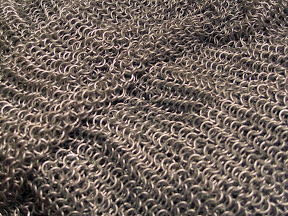
It's been a while since I posted any of my projects because I've been so busy with the projects themselves. One such time-intensive project is making some chainmail armor. After reading an Instructable on making mail I've been wanting to try the process out myself. It seems fairly simple.
Here are the 2 resources I've found most helpful:
European 4-in-1 maille (chainmail) speedweaving (PDF)
Butted Mail: A Mailmaker's Guide - 4th Edition (PDF)
Butted Mail: A Mailmaker's Guide - 4th Edition (PDF)
(I encourage visiting the source website for any updates, but just in case they are no longer available I have provided links to a PDF version of each.)
When I told David about my plans he got really excited about it and wanted to make some too. So we've been working together on this project. He's probably put in the most time so far with making rings and weaving his own shirt (with my help and guidance along the way).
Making Rings -
I want 1/4" rings so according to the chart on the Mailmaker's Guide I would need to use 18 gage wire. I found some 17 gage galvanized electrical fence wiring at Ace Hardware, which seems close enough. At $16 for a 1/4 mile it's a good deal. While I was there I picked up a 1/4" metal rod, a couple needle nose pliers ("toothless" to prevent marring the rings), and metal cutting shears.
I had some spare plywood from a previous project that I used to construct a simple frame for the mandrel.
Forming the coil around the mandrel was pretty easy. We picked up that skill right away. But cutting each ring from the coil took a great deal of learning and adjusting. At first we were cutting 2-3 at a time letting the jaws of the shear close all the way. This was causing the rings to open up and become misshaped. It would take only a few minutes to cut an entire coil (about 100 rings) but about an hour to reshape all the rings back into a round shape. There was no way this method was going to work out.
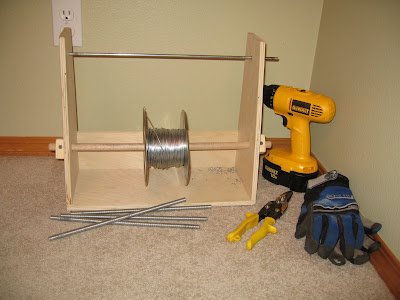 |
| Ring forming station |
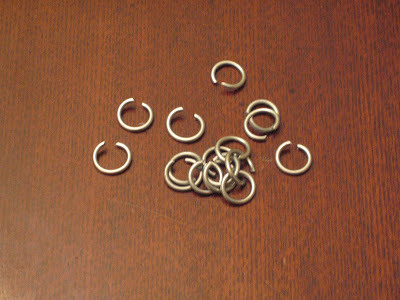 |
| Misshaped rings need to be formed back into a circle |
Eventually, David figured out that if you don't let the jaws close all the way, but just "nibble" off 1-2 rings at a time (letting the jaws bite into, but not completely cut the 3rd & 4th rings) then the rings don't open up. So this has been our method. After each "nibble" you have to pull the coil off the shears and let the rings come off the jaws, then carefully line the shears back up with the notches you left on the next rings so you can cut in the same spot again. It takes just a little bit more time to cut as you have to go slower and be more careful, but it saves a great deal of time.
 | 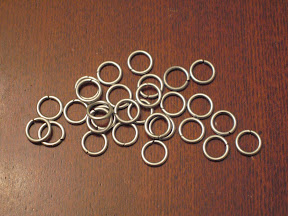 |
| Good cut rings | Closed rings |
Video Link
Weaving -
We started out by making a hauberk for David (following the pattern in the Mailmaker's Guide linked above) and speedweaving using the technique from the Instructable (linked above). I chose to start with this because it has very large areas of just standard weaving with only a few places to make expansions or contractions. I figured this would be one of the easier projects to start with.
While I prefer the speedweaving method illustrated in the Instructable, David has come up with his own that I will illustrate below. I think either method takes about the same amount of time. The choice is really just a matter of preference. I like my method only because it gives the appearance of rapid progression even if you have to double-back.
David's speedweaving:
Link the closed GREEN ring to the open RED ring, then attach the open RED ring to the mail through the 3 rings as shown above.
 |
| Modified speedweaving |
Since David has been doing most of the work on the hauberk (which is coming along nicely) I also wanted to do a quick and easy project. With our recent interest in Dungeons and Dragons I thought it would be cool to have a chainmail dice bag. It took some time to figure out how to do the contractions just right to round off the bottom of the bag nicely without getting the rings too bunched up, but I eventually figured it out. I also didn't want the metal rings to mark up my dice so I sewed in a satin liner. (Did I mention that satin is a pain to work with? The edges just fall apart with the slightest tug and it's so slippery. I eventually got it sloppily sewn together, but since it's inside the chainmail and won't really be seen I wasn't too concerned with the looks.) I finished of the top with a draw string. I'm really happy with the way it turned out.
After I finished it I looked online to see if this was a unique idea or if others had been making them too. Not only is it not unique (do a Google image search for "chainmail dice bag") but there are even kits. And just a few days ago I saw a video about one on the Make blog. Oh well.
 |
| Gaming dice bag (+1 AC) |
So while David continues work on the hauberk I have also begun work on the coif (hood). I'll post pictures once they're all done.